
You just sang the title of this post in tune to My Highland Goat, didn’t you? Hmm, I thought so.
Before you ask, I don’t have any goats, but I am the proud owner of two pairs of Jutland Pants (pdf pattern from Thread Theory). What’s the connection, you ask? There is none, so let’s move on.
Whoa… not so fast… I’m going to take my lead from the site name and start by being “sewcial.”
So, a little about me. I am married to my best friend, Fred. Between us, we have five children (aged 24-30), six grandchildren (aged 2 months to 11 years) and six cats (aged… oh, nevermind).
I am now 50 and have been sewing for as long as I can remember…almost. I still recall one of the first things that I made completely on my own with no help from my mum. It was a hand sewn cloth doll made from old denim jeans, with pink wool hair. I made her a crocheted jacket and gathered skirt; I even made her underwear! My mother had a Singer treadle sewing machine, but I was still too short to reach the peddle, so had not yet learned to use it. I was 9 years old and was so proud of that doll, despite her visible stitching, lumps in all the wrong places (I feel her pain), one leg shorter than the other, and pink hair, long before pink hair was fashionable.
Despite her imperfections, I thought she was perfect. No sooner was she finished than I began planning what I could make next. Ok, I admit it; no sooner was she finished than I begun contriving a means to swindle some fabric out of my mum who could ill afford it. Then, I started planning. Oh, who am I kidding; I’ve never been much of a planner… ‘imagining’ is more apt a word.
Needless to say, I became a pioneer of upcycling and I’ve yet to stop imagining. Over 40 years on and sewing is still my number one creative outlet and upcycling has finally come into its own.
Ok, enough about me; back to the Jutland pants, which were made especially for me, despite buying the pattern for my husband, who still owns none. Why is that? Well, that’s how it goes when you’re the one doing the sewing, I suppose. Seriously though, I do intend to make him some… one day… probably. In the meantime, I want to share what I love about them and why they’re perfect for me. I’ll even give a few tips should you decide to make some (which I totally recommend you do!)

I did mention I was 50, didn’t I? Well, with age, comes wisdom, experience, hindsight… and perhaps a few extra inches on the waistline. I’ve come to terms with the fact that my body is not a standard size anymore. I don’t care; I’m 50, not 15! Besides, I can sew whatever I want, so ner ner to a skinny waistline. Being 50 also means that, even though I still like to look good, comfort trumps trying to squeeze into a pair of pants that barely cover my pubic hair and leaves me competing with the Muffin Break for muffin top of the year! I am 172cm (5’8″) tall and my waist measurement places me about two sizes outside of my other measurements (41, 36, 42).
Even before my waistline became out of whack with the rest of me, I discovered that men’s pants (those labelled and sold as menswear) fit me perfectly when I got my first pair of work trousers back in the early 90s. At the time, there was little choice in high visibility women’s clothing (those labelled and sold as womenswear) and although we’ve come along way with gender stereotypes in the 30 years since I began wearing protective clothing (I work in heavy industry), I now prefer the fit of the men’s trouser over ones made for woman.
The odd (ok, shortsighted) thing is that although I have been wearing men’s pants to work for almost 30 years, and buying men’s RTW trousers for around 10 years, it never occurred to me to sew pants using men’s patterns. I guess, given I could modify women’s patterns to fit, I never thought to use men’s patterns by preference. In my defence, one of the things all us sewist brag about is the ability to magically modify patterns to fit our unique bodies at the wave of a hand. However, in the end, my laziness trumped my magical abilities and I decided to try the Jutland Pants for me.
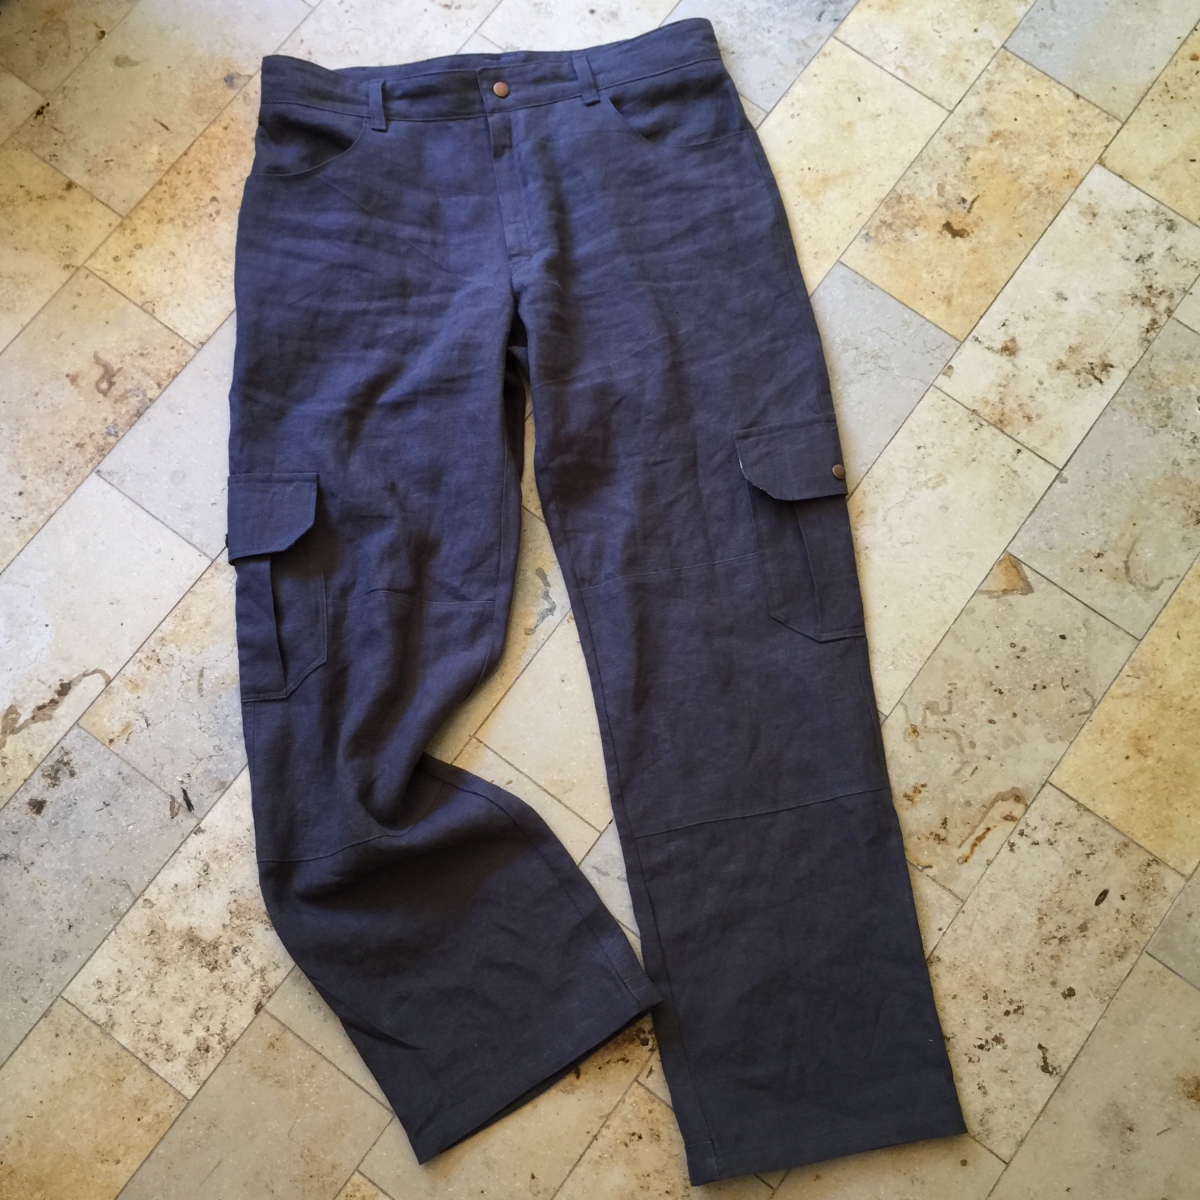
I am so glad I did. I made my first pair from a dark grey heavyweight linen. I cut a straight size 36, or so I thought. Somewhere along the way as I was tracing the pattern, I realised I was copying the 34, so decided to risk it and keep going. After all, I could always wave that magic wand and they would fit. Maybe not! I decided to measure the pattern before cutting the fabric and modify from there if need be. It’s about now that I suppose I should warn you that I am not a very compliant sewist. I’m not a very compliant anything, come to think of it, but that’s a story for another day.
Anyway, I didn’t read the instructions, so didn’t realise that it called for flat felled seams (that’s my excuse for not doing felled seams and I’m sticking to it). Instead, I just used my usual seam allowance of about 8mm (1/3”) and it appeared that the size 34 would fit OK, so I just went with it.

I had some scraps of Liberty of London tana lawn that matched the grey linen perfectly, so decided I’d make them all pretty inside. I really like the way they look, and although it adds no practical value to the garment, I do like things to look as good inside as out. I sewed the pocket lining inside out to get the full benefit of the print. I previously used this method with some Ginger and Morgan Boyfriend jeans I had made, so I had already resolved the inside out vs maximising pattern visibility struggle long before making the Jutlands. Believe me, the struggle is real, but looks won out over a making a deliberate mistake in the end and I’ve been making my pocket linings inside out ever since.
Maybe the pattern called for it, maybe it didn’t, but I decided to unpick the zip flap and add some interfacing, as I thought it felt quite flimsy and I was worried that the brass zipper pull would wear through. It was a bit of a pain, but I’m glad I made the effort to fix it before adding the waistband.

I tried the trousers on prior to adding the waistband and they fit perfectly (Michelle fist pumps the air). The pattern comes with a straight waistband, which after attaching, I concluded would have been better had it been curved. Although the fit is awesome, the waistband gapes at the back. Interestingly, the finished waistband measures 36 inches, despite cutting the 34, so my lack of compliance with regard to seam allowance prevailed in the end (I’m not always this lucky).
I made no modifications to the sizing, but decided that for my second pair, I would raise the knee guards and side pockets by about 3-4 inches and not bother with the cuff guards. Given I needed to shorten the pants by around 2-3 inches, there is very little remaining of the cuff guard anyway. I could have raised that too, on my second pair, but don’t think it’s required for me as they’re not real work pants and I’m unlikely to need it. Pockets are optional, or so says the pattern (I read that bit). Pfft, optional! I think not! The pockets are one of the things I love about this pattern, therefore optional is not an option for me.
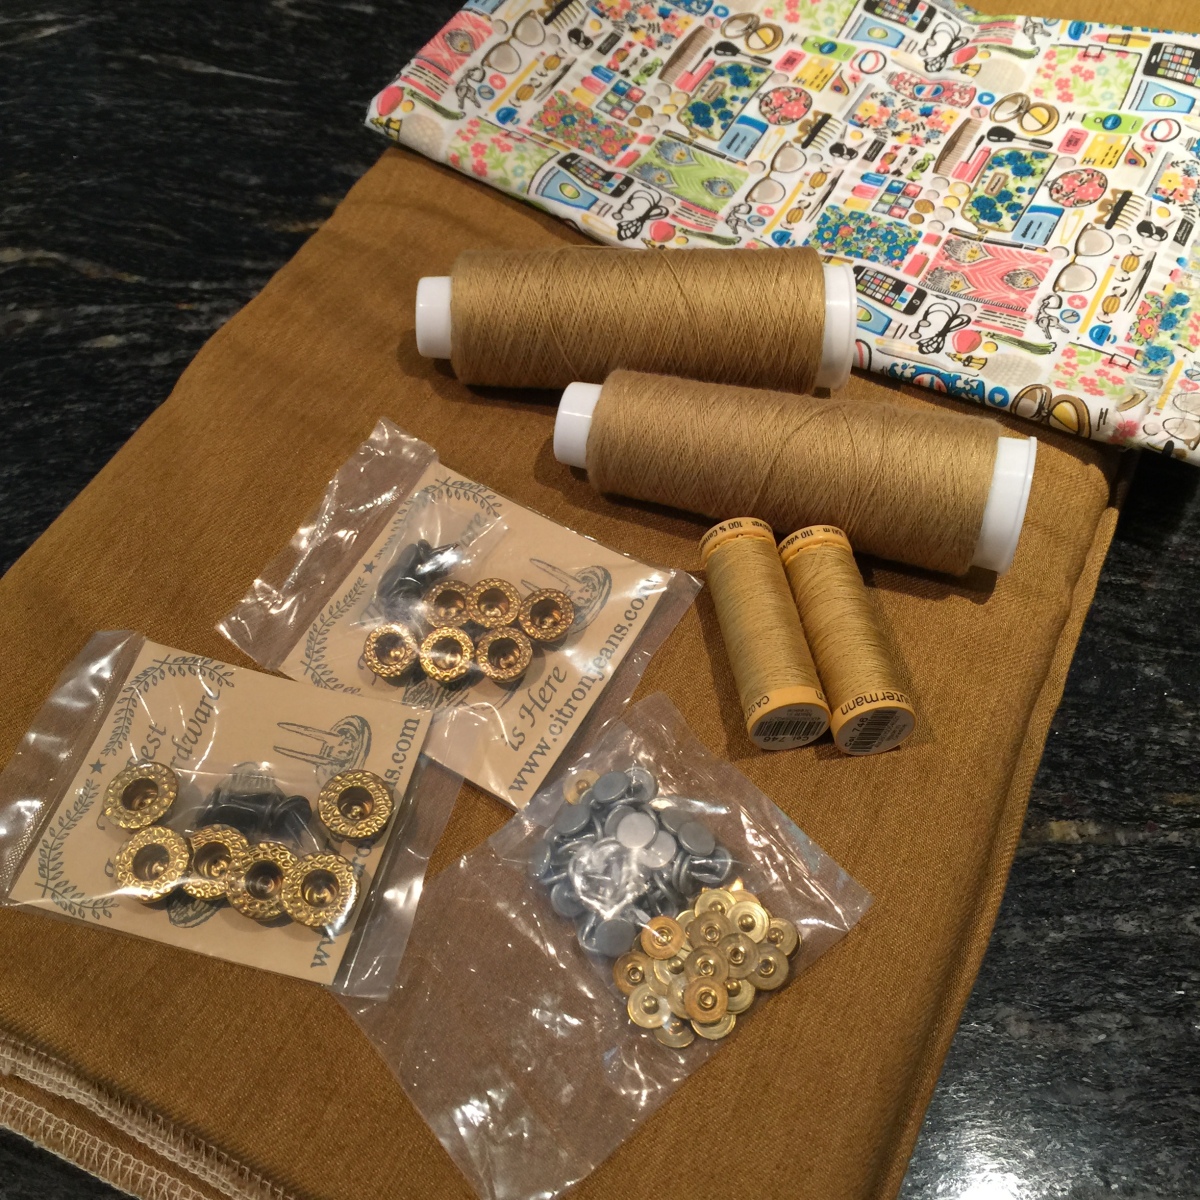
For my second pair, I ordered some lush mustard coloured denim that I had been coveting for ages. I’ve been on the lookout for mustard denim for a long time, so when I found some on eBay, I snapped it up quick smart. It took about a month to arrive in Australia from the UK, but I was very happy with the quality and colour, so it was worth the wait. I ordered two metres, once again, not checking the pattern requirements, but knowing from my first pair that it was more than enough as it was 150cm (60″) wide. In the meantime, I ordered some more Liberty lawn for the lining and gathered my supplies. I decided to go all out and add some solid brass hardware to this pair.
Although not strictly necessary, I set up two sewing machines, so that I wouldn’t have to keep swapping between top stitching mode to normal stitching (this is where you call me a spoiled brat and scowl at my extravagance). Seriously though, changing needle and thread every time I need to top stitch was just not going to happen any other way. I did mention that I was lazy!

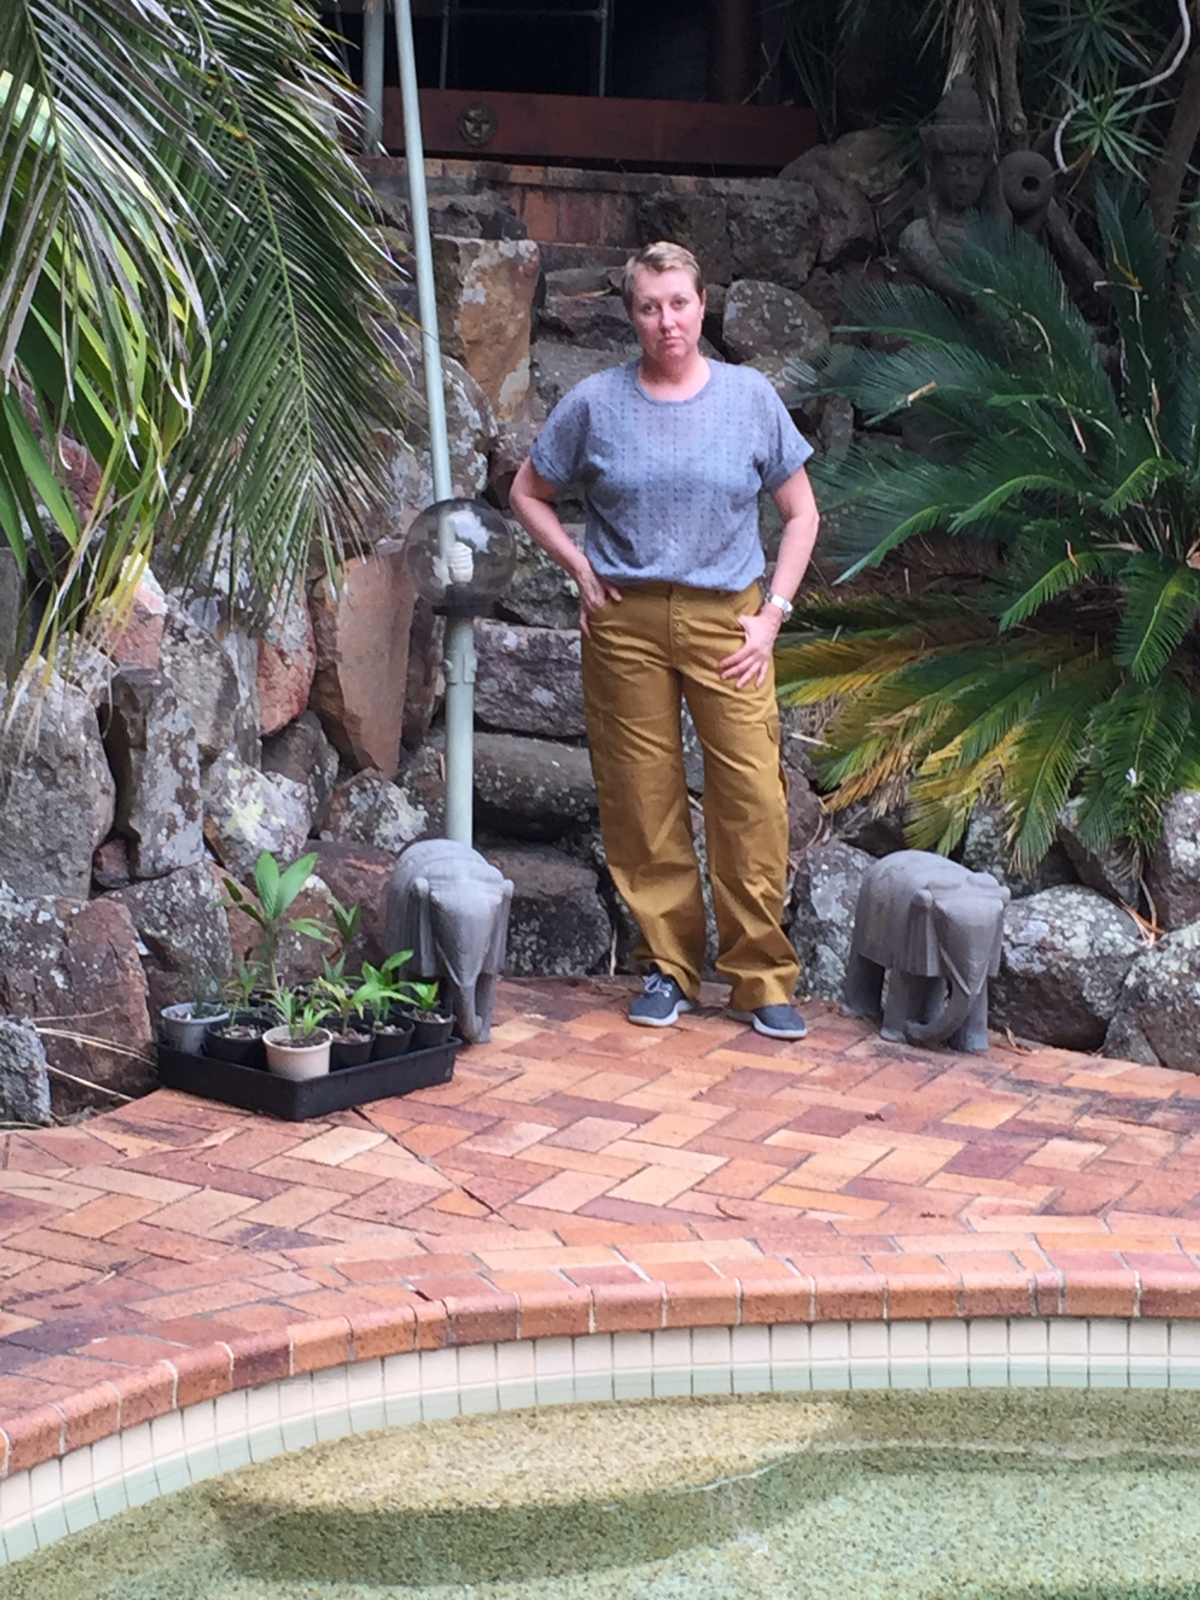
For this pair, I did raise the pockets and knee pads by about 4 inches. Instead of slashing and joining the pattern to shorten, I simply widened the knee patch so that I could place it higher up on the leg. I also cut a curved waistband. I just winged this based on my experience at making other pants with a curved waistband and it fit perfectly. No gaping! I rule! You can see from the picture how much curve I added.

You can see below how well the waistband fits. They could be more snug, but I’m a baggy pants kinda gal, so like them just as they come. Note to self: You may regret this decision when they stretch, and you know that that they will. Meh… I guess it’s nothing that a quick run in a hot dryer won’t fix.
Here’s the front view… don’t those buttons look pretty?

Oh, yeah, I almost forgot to mention that the button fly was not standard. I added it because I didn’t have a matching zip and was too lazy to go find one. I do like how it turned, so let’s just pretend it was my intention to do this all along . What do you reckon; it looks like it belongs, don’t you think?
A promised you a few tips, didn’t I? The first one is probably self-evident, but it’s surprising how easy it is to overlook, so I’m going to mention it anyway. Make sure you line the pockets up along the side and top before attaching. They don’t always line up despite being cut the same. Ask me how I know?

If, like me, you find top stitching a bit tedious and hate how every little measly deviation form a straight line is sooo visible, I recommend sewing tricky parts, like pockets and plackets, with matching standard thread first. That way, you don’t need to focus on attaching something and sewing a straight line at the same time. I top stitch over the previous sewing lines which make an excellent guide. If you match the thread colour well, you’ll hardly notice the stitching underneath. This is particularly useful when topstitching thicker fabrics like denim, which can be a bit temperamental sewing over multiple layers. Can you tell that’s what I’ve done? Oh, and use a topstitching needle. No excuses, just do it… and have a spare. You won’t regret it.

Another tip I’ll leave you with is about finishing the waistband. I think this pattern leaves you the choice of tucking the inner band under or finishing with bias tape. I highly recommend using bias tape and simply top stitching it on place. It’s so much easier and looks great…and tidy. Plus it reduces bulk, so makes for a neater top stitch. Talk about an easy win, right there.

All in all, I love the way these Jutland Pants turned out. It’s a fantastic pattern and comes with a range of great options. I can’t recommend it enough, for any gender! I have no doubt there will be more of these in my future. Who knows, my husband might eventually score a pair. Thanks to the great fit of these, I am now starting to look for other “men’s” patterns and all the possibilities I’ve been overlooking until now.


Note: The Sewcialists is a hyper-inclusive editorial site. We recognize that “Menswear” as we use it in our theme month is a very loaded term, and we use any gendered reference in these discussions to denote the most broadly accepted “traditional” categories only, without wishing to prescribe or proscribe what any person can wear. We recognize all gender identities and the choice to dress how one pleases.
Michelle can be found living with her family, wearing her Jutland pants with her many other fabulous makes, and expressing her fantastic sense of humor on Instagram @zoetemeyer.
These look great. Like you men’s RTW pant have always fit me better than women’s but I had never thought of sewing them for myself either. I will have to try this. I subscribe to Burda and I pretty much just have to grade out at waist on their women’s trousers. They are reputed to have crotch seams more like men’s than Anglo pattern companies. Anyway the magazine has men’s cargo pants much like these I can try without buying a pattern.
Sounds like I need to check out Burda (because I have enough patterns already, said no one ever). It’s always a bonus if you can try something new with what you already have. Cargos have kind of spoilt it for me jeans with all those extra pockets, so be warned, you might not stop at one pair 🙂
Sounds like I need to check out Burda (because I have enough patterns already, said no one ever). It’s always a bonus if you can try something new with what you already have. Cargos have kind of spoilt it for me jeans with all those extra pockets, so be warned, you might not stop at one pair 🙂
I’ve just finished cargo shorts. I think I already am hooked.
https://www.burdastyle.com/projects/colour-blocked-cargo-shorts
They look great. I can see you’re in Toowoomba so I imagine they’ll get a lot of wear. I’m in Newcastle and I could certainly do with some comfy shorts about now 🥵
I really enjoyed reading your post! Thanks for the top stitching tip . . .I’m going to give it a try. You’ve done a very professional job on those pairs of pants; thanks for the details.
Glad you enjoyed it. Good luck with your top stitching. Anything that makes it easier is good in my books. I often wuss out and don’t bother. Who can be stuffed unpicking all those stitches that are too tough to rip out, right?
Glad you enjoyed it. Good luck with your top stitching. Anything that makes it easier is good in my books. I often wuss out and don’t bother. Who can be stuffed unpicking all those stitches that are too tough to rip out, right?
Wow, both pair are totally professional looking. And what an interesting idea to try memswear patterns to get the waist to hip ratio closer to reality for some of us, like me for instance.
Thank you. I think there’s many of us who don’t have the “ideal” hip/waist ratio that might not have considered men’s patterns, so hopefully others might have success like I did.
Well done! I love the printed trim inside. And I don’t think you are spoiled at all. I’m 68 and still sewing, and one thing I’ve learned is that if we are going to keep doing this as we age, we have to accommodate our aging selves. My mother, aunt, and mother-in-law all quit sewing when they were younger than I am because they never had good places for cutting out. If having two machines keeps you going, I’m all for it.
Cutting space is important. My husband says I have three sewing rooms. The kitchen and dining room are 2 and 3.
Nice! I have that pattern and that waistline, but have been hesitant to make a pair for Hubby because he’s kinda picky about clothes. So if I make a pair for me as a rehearsal… It. Just. Might. Work!
I have no doubt it would work 😉 Your hubby will be begging fro some once he sees yours.
Your pants look great!
I’m wondering that nobody seems to have problems with the pattern. I was so happy that I finally found a pattern maker who gives finished garments measurements and I made the mistake to believe in them without checking. My muslin turned out way to big.
After that I measured the pattern and recognized that the waist is way bigger then stated in the garment measurements.
Also the legs get VERY baggy in bigger sizes. I’m trying to cut a 42 now with 36 legs.
Oh, how disappointing. I never had this issue, or if I did, I never noticed 🙂